· FabLab Westharima Team · 3D Printer · 8 min read
[For Beginners] How to Use a 3D Printer - Basic Operation Guide
For 3D printer beginners, detailed explanation of basic usage and procedures up to printing. Learn how to operate FDM type printers.
“I want to start 3D printing, but what should I prepare first?” Are you having such concerns?
Actually, 3D printers are easier to start than you think.
This article explains how to start with 3D printers for complete beginners based on the latest 2025 information. I’ll introduce what you need, step-by-step usage procedures, and common failures and solutions based on real experience.
What is a 3D Printer?
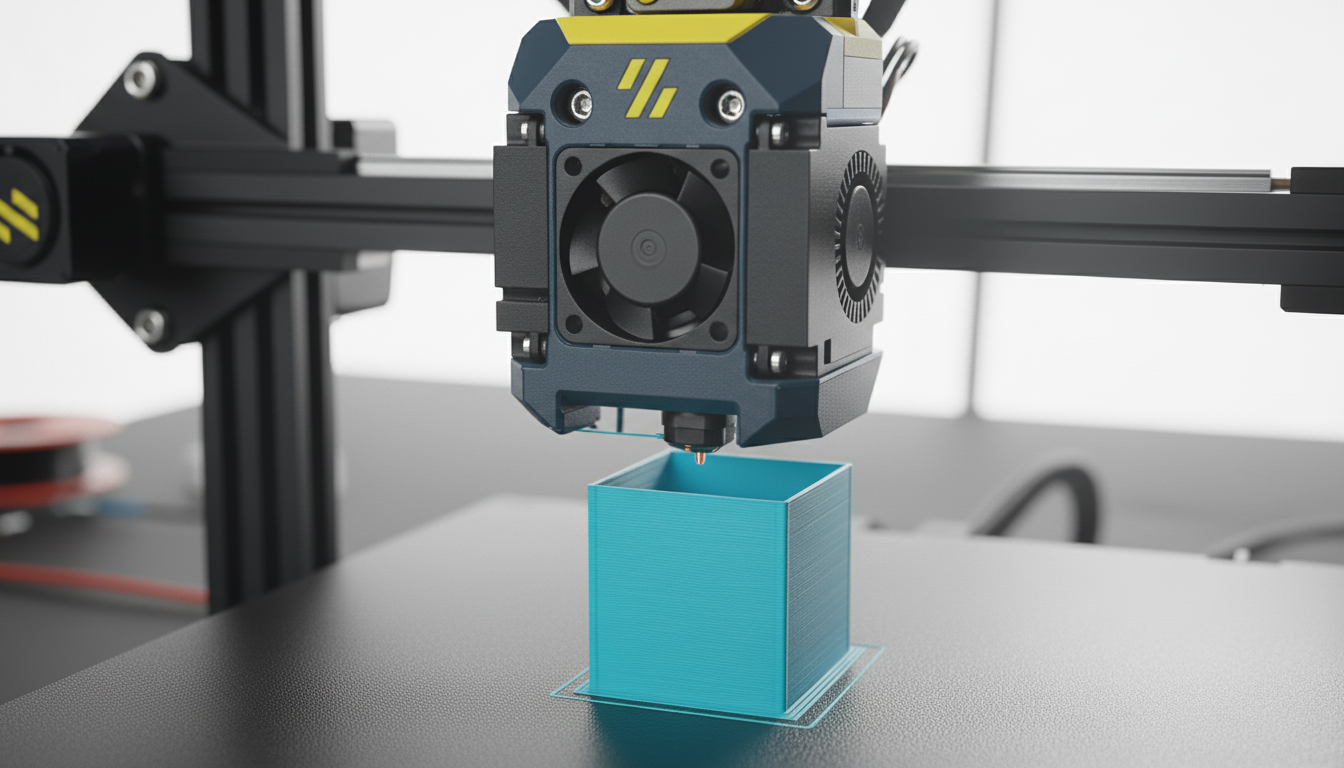
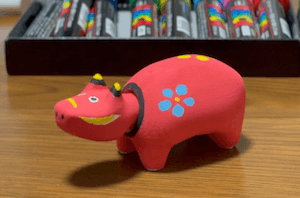
A 3D printer is a machine that creates three-dimensional objects by layering materials such as resin based on 3D data created on a computer. You can create various things such as figures, repair parts for daily necessities, and original goods.
As of 2025, home 3D printers have become more affordable and higher performance. Beginner-friendly models can be purchased from the 20,000 yen range, and now that the technology has matured, it’s the best time to start.
Main Types
There are two main types beginners should know:
- FDM (Fused Deposition Modeling): Melts and layers resin filament. Most popular for home use with excellent cost performance.
- Resin Printing (SLA/LCD): Hardens liquid resin with light. Suitable for precise figures and detailed beautiful modeling.
For beginners, FDM type is recommended as it’s easy to handle and material costs are low.
2025 Trends
3D printing technology is evolving rapidly.
- Standardization of Auto-Leveling and AI Functions: Automatic bed adjustment and failure detection functions have become common. Failures reduced even for beginners
- Multi-Color Printing: Printers that can switch between multiple colors have become affordable
- High Speed: Printing that used to take 8 hours now completes in 2-3 hours
- Rich Information: Abundant Japanese and English information on YouTube, Discord, Reddit. Solutions found immediately when in trouble
Compared to a few years ago, the current environment is really blessed. Even I, who had many operations to do and felt weak at it until a few years ago, now feel that tasks have drastically decreased.
What You Need
| Item | Details | Reference Price |
|---|---|---|
| 3D Printer Body | For beginner FDM type, pre-assembled models are recommended. | 20,000 - 100,000 yen |
| Computer | General laptop is sufficient. High specs not required. | Existing PC is OK |
| CAD Software | For 3D data creation. Rich free software available (described later). | Free - Paid |
| Slicer Software | Essential software to convert 3D data to G-code. | Free |
| Filament (Material) | PLA is recommended for beginners as easy to handle. | 1kg 1,500 - 3,000 yen |
| Tools | Spatula, file, nippers, etc. | 2,000 - 5,000 yen |
2025 Recommended Models: For beginner-popular Bambu Lab series (A1 mini/P1S), detailed comparison review in separate article. If you’re wondering “which model to buy”, please see this as well. → Bambu Lab 3D Printer Thorough Comparison Review: A1 mini vs P1S
You can start from about 30,000 yen with minimum configuration, or about 60,000 yen with complete set.
How to Use a 3D Printer
I’ll explain the flow to actually create modeled objects in 9 steps. Trial and error is necessary at first, but anyone can master it once you understand the basics.
STEP 1: Prepare 3D Data
A. Download from Sites (Recommended for Beginners)
First practice with existing data. You can download STL format data from free sites such as:
- Thingiverse: World’s largest. Millions of data items for free
- Printables: Many high-quality data
- MyMiniFactory: Quality-focused
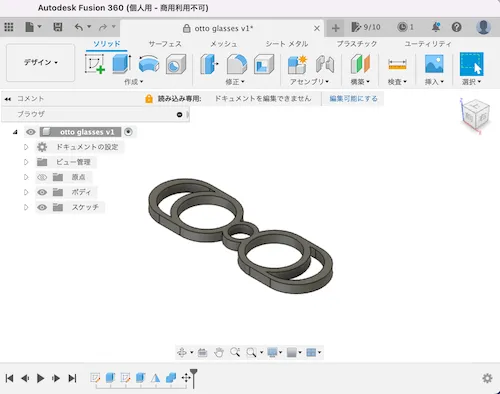
- 3D MODELABO: Japanese support (membership system)
B. Create with CAD Software (Try When Accustomed)
If you want to create original modeled objects, use CAD software.
- Tinkercad (Free): Runs in browser. Intuitive and beginner-friendly
- Fusion 360 (Free for personal use): Serious design possible. Rich tutorials
- Blender (Free): High functionality but steep learning curve
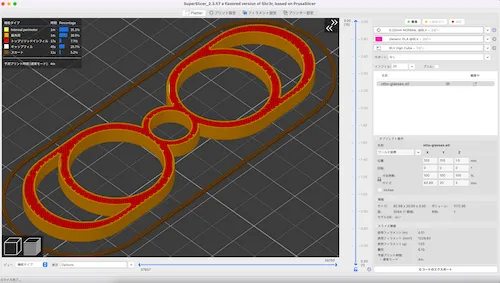
Recommended Book for Learning Fusion 360: Autodesk Fusion Masters Guide Basic Edition Revised 3rd Edition Operation procedures, command usage, block movement methods, tips, etc. are written in detail without skipping procedures, easy to understand even for beginners.
Example: Create 3D data in Fusion 360

STEP 2: Output in STL Format
Convert data to STL format.
If downloaded:
- Find and use STL file from files
If created in CAD:
- Save 3D data in STL format using export function (In Fusion 360: “File” → “Export” → “STL”)

STEP 3: Convert to G-code with Slicer Software
This is the most important step
- Use slicer software to convert STL data to G-code (.gcode format) that 3D printer can understand.
- Slicer software “slices” 3D model into hundreds of thin layers and creates instruction file for printer.
- Quality of slicer settings determines 80% of output quality.
Recommended Slicer Software
Beginners should first use the manufacturer’s genuine slicer of purchased printer.
- Presets are optimized so no settings needed
- Few troubles and easy to receive support
Examples: Bambu Studio (Bambu Lab), Creality Print (Creality), AnkerMake Studio (AnkerMake), etc.
When using multiple models or want more detailed settings:
- UltiMaker Cura (Free): Most popular general-purpose slicer. Japanese support available
- PrusaSlicer (Free): High functionality with detailed settings possible

Main Settings
Beginners should initially use presets (default settings). Adjust when accustomed.
- Layer Height: Thickness of one layer. 0.2mm (standard) recommended
- Infill Density: Internal fill rate. 15-20% is sufficient
- Print Speed: Start from 50mm/s (standard)
- Temperature: Follow filament recommended values (e.g., PLA: Nozzle 200°C / Bed 60°C)
- Support Material: Necessary for overhang or bridge shapes. “Tree support” is easy to remove
![]() | ![]() |
|---|---|
| Without support | With support (brown parts): Remove with nippers after printing |
Note: Model in image is “3DBenchy”. Designed for printer performance testing, ideal for quality confirmation.
STEP 4: Transfer G-code to Printer
Save G-code to USB memory/SD card and insert into printer. This method is most reliable for beginners. Wi-Fi connection or USB direct connection is possible but not suitable for beginners in terms of settings and stability.
STEP 5: Set Filament
Set material on filament holder and pass through to nozzle. Many 2025 printers have automatic loading function.
- Point:
- Filament is weak to humidity, so store in airtight container with desiccant after use.
- Using filament dryer is also recommended.
STEP 6: Bed Leveling
Properly adjust distance between print bed (platform) and nozzle. This is beginners’ first challenge.
- Too close: Nozzle clogs, damages bed
- Too far: Filament doesn’t adhere and fails
Recent printers have auto-leveling function that automatically adjusts. For manual, use gap of one sheet of paper as guide.
STEP 7: Start Printing
Ready. Start printing from printer screen.
Print time guide: Small items 30 min - 2 hours, Medium 3-8 hours, Large 10+ hours
Check only first few layers, if no problem then leave to printer. However, for long prints, avoid when going out.

STEP 8: Remove Modeled Object
After printing completes, wait until bed cools (5-10 minutes). When cooled, it shrinks and becomes easier to peel. Carefully remove with spatula or scraper.

STEP 9: Finishing
Remove support material with nippers and sand with file as needed.

Convenient to have files of multiple roughnesses
Complete! From the second one onwards, you’ll be able to make smoothly.
Recommended Beginner Projects
For those wondering “What should I make first?”, here’s recommended order.
| Order | Project Name | Reason | How to Find Data |
|---|---|---|---|
| 1st | Cable Holder | No support needed, completes in 30 min, practical | Search “cable holder” on Thingiverse |
| 2nd | Phone Stand | Support practice, usable daily | Search “phone stand” on Thingiverse |
| 3rd | 3DBenchy | Performance check, understand quality of settings | 3DBenchy Official |
When Accustomed: Try small containers, key holders, figures, repair parts, etc.
Point: Start from small and simple shapes. Accumulating successful experiences is key to maintaining motivation.
Common Failures and Solutions
| Failure Type | Symptom | Main Solutions |
|---|---|---|
| First layer won’t adhere | Filament doesn’t stick to bed, becomes stringy | ・Re-adjust bed leveling (one paper gap) ・Raise bed temperature (60°C for PLA) ・Clean bed with alcohol |
| Peels during printing | Modeled object peels from bed | ・Raise bed temperature ・Weaken cooling fan (0% for first few layers) ・Add brim (base) |
| Filament runout | Filament runs out during printing | ・Check remaining amount before printing ・Check required amount in slicer ・Replace with new reel before long prints |
| Filament tangling | Filament stops being supplied during printing | ・Choose filament from reliable manufacturer ・Handle carefully to prevent spool from collapsing when replacing ・Always secure through spool hole after use ・Check spool can rotate freely ・Re-spool if tangled |
| Stringing | Spider web-like strings appear between modeled objects | ・Lower nozzle temperature by 5-10°C ・Enable retraction (pull back) in slicer |
| Layer shifting | Layers shift or steps appear | ・Tighten printer belts ・Lower print speed (to about 40mm/s) ・Place on stable location |
| Nozzle clogging | Filament won’t come out | ・Dry filament ・Raise nozzle temperature and clean ・Replace nozzle (prepare spare) |
From experience: After output start, observe whether above problems occur for several layers, if no problem then leave to 3D printer.
Keys to Success
- Quality Filament: Too cheap materials have uneven diameter causing troubles
- Slicer Settings: 80% of quality is determined here
- Regular Maintenance: Regularly check belts, nozzle, bed leveling
Precautions
- Modeling Size: Check printer’s maximum size. If too large, divide
- Time: Even small items take several hours. Plan with margin
- Copyright: Be careful of copyright for character data, etc.
- Safety: Manufacturing weapons or dangerous items is illegal
- Heat/Strength Limits: PLA deforms above 60°C. Use ABS or PETG if heat resistance needed
- Ventilation: ABS emits odor and trace harmful substances, so ventilate
Summary
Anyone can master 3D printers once you understand the basics. With 9 steps of prepare data → STL conversion → slice → print → finish, you can enjoy the fun of creating original works.
Points
- Use quality filament
- Carefully adjust slicer settings
- Don’t neglect regular maintenance
- Don’t fear failure, enjoy trial and error
Next Steps
Once you master basics, move forward.
| Step Category | Specific Action Examples |
|---|---|
| Level Up | - Polish CAD skills and try self-modeling - Try other materials like ABS, PETG, TPU after getting used to PLA |
| Community Participation | - Publish works on Thingiverse, Printables - Learn techniques from other users on YouTube, X |
| Practical Use | - Create repair parts for daily necessities - Produce figures, miniatures, model parts - Prototype production and original goods sales |
3D printers expand possibilities from “want to try” to “master” and then “create”. Please start your 3D printer life referring to this article!


