· FabLab Westharima Team · 3D Printer · 5 min read
First Attempt at Making a Lure - Using Fusion360/3D Printer
Inspired by middle school student lure making, first attempt at making a lure using Fusion360, 3D printer, and airbrush. Detailed explanation of the process actually experienced by a beginner.
Inspired by middle school student lure making, I impulsively decided “I want to make one too!” and attempted my first lure making. As a beginner in lure making, 3D printers, airbrush, and 3D CAD software Fusion360, there were many processes that seemed difficult, but I managed to create a lure. In preparation for the next time I make one, I’ll record the process as a memo before I forget (see below).
Lure Making Process
※In my case, I studied the basic knowledge of Fusion360 “Form Modeling Basics” from a book. See next chapter for details.
STEP 1: Create Body
Create Body
Create lure body in 3D CAD software Fusion360 using “Form → Cuboid”, adding blocks, modifying forms, etc. ※Also utilized mirror function to make it symmetrical.
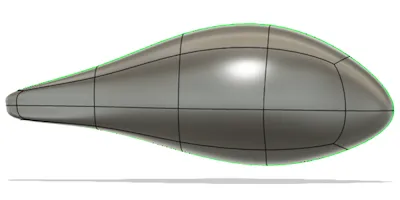
Body viewed from side
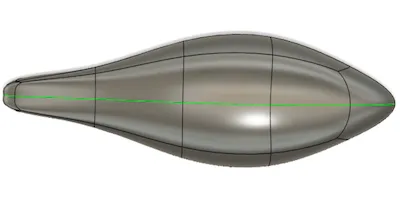
Body viewed from above
STEP 2: Internal Structure
Create Internal Structure
Create internal structure in Fusion360. (General procedure below)
1. Split body in half 
2. Create walls by making inside of body hollow with shell. 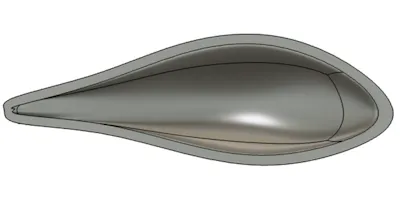
3. Create spaces for weights/beads/lip, air layer, and hook eye space (Utilizing sketch, extrude, surface offset, split, etc.) 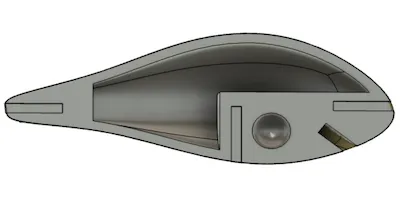
STEP 3: Create Eyes
Create Eyes on Body
In Fusion360, made eye parts of body about 1mm recessed. (Procedure: Draw circle in sketch → Extrude → Surface offset → Split with surface offset face) ※Created to accurately position sticker placement symmetrically. 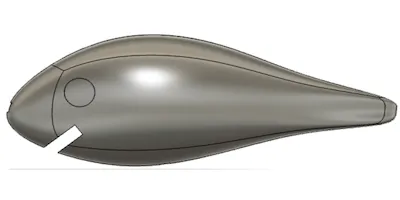
STEP 4: Mirror Copy
Create Other Half with Mirror Function
STEP 5: Export Data
Export 3D Print Data (simplify3D)
Select “Tools → Make → 3D Printer” in Fusion360 to display 3D printer dialog box, ・Click body half ・Application: Select simplify3D ・Print Utility: Select Custom Click OK to export to simplify3D

STEP 6: Slicer Settings
Slicer Settings
In Simplify3D, made flat surface of body the bottom and configured slicer settings. ※“Quality of 3D printer output changes depending on slicer settings”, so repeated fine-tuning of slicer settings until satisfied.

STEP 7: 3D Print Output
3D Printer Output
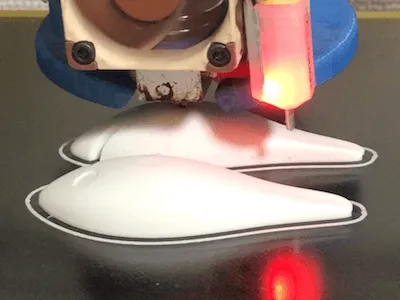
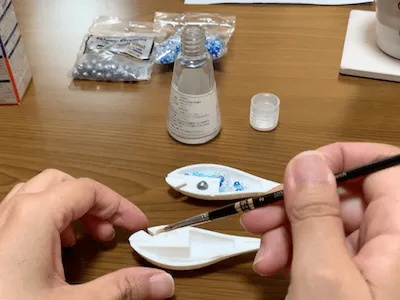
STEP 8: Glue Parts
Put weights and beads into 3D printer output parts and glue with acrylic resin adhesive.
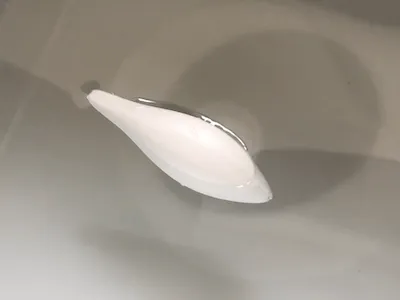
STEP 9: Check Floating
Check Floating in Water
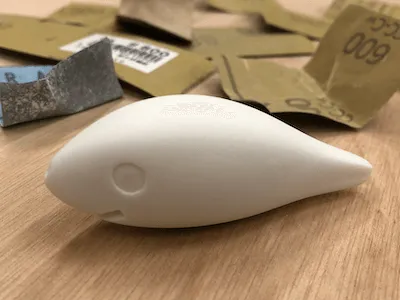
STEP 10: Sanding & Base Prep
Sanding and Surfacer Application
Since “quality of base affects quality of painting”, repeated steps 1-4 many many times until satisfied to eliminate 3D printer layer marks.
- Sandpaper 400 → Wet sanding paper (600 → 800 → 1500)
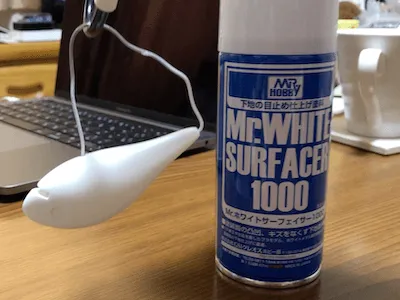
- Apply Surfacer ※Make handle by inserting wire into front and back holes of lure before applying
- Dry (Hang wire on S-hook to dry)
- Check presence/absence of 3D printer layer marks with light
During sandpaper and wet sanding work

During Surfacer application
STEP 11: Surfacer Finish
Surfacer Application
Apply Surfacer. (Just in case, did one final coat so sink marks and scratches won’t affect painting.)
STEP 12: Undercoat Coating
Water-based Urethane Coating (Undercoat Before Painting)
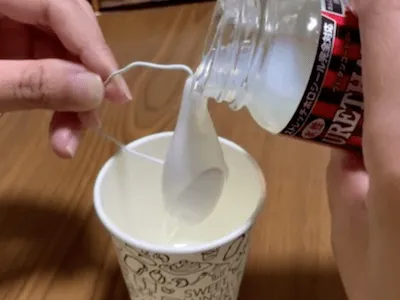
Coated with water-based urethane. (Procedure below)
- Apply water-based urethane all over (dip coating or pour from above)
- Natural drying (about 2-5 minutes)
- Hair dryer drying (about 5 minutes)
- Natural drying (about 1 day) Took quite a lot of time.
STEP 13: Airbrush Painting
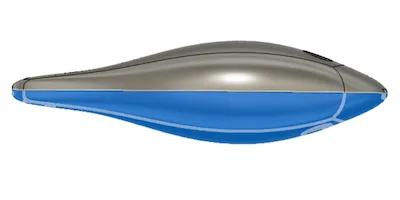
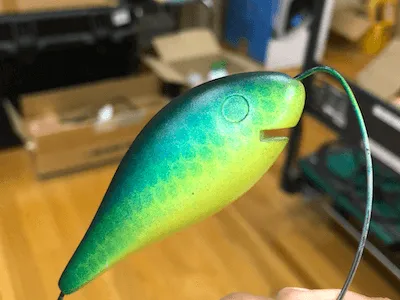
Airbrush Painting
Painted in order from weak to strong hiding power colors. ※Washed airbrush handpiece every time I changed colors. (To prevent color mixing and dirt)
Reference: How to Use Airbrush
STEP 14: Attach Parts
Making Hook Eyes, Eyes, and Lip
【Hook Eyes】 ・Made with wire and attached with Bond Quick 5
【Eyes】 ・Made with stickers and attached
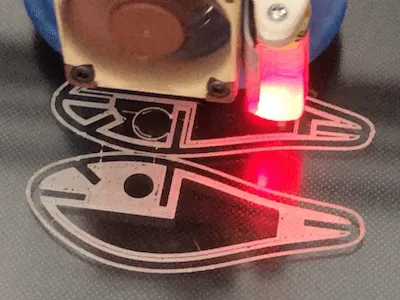
【Lip】
- Create lip data in Fusion360 and export.
- Cut acrylic plate with laser cutter.
- Attach lip to lure with Bond Quick 5.
STEP 15: Top Coat
Water-based Urethane Coating (Top Coat)
Repeated water-based urethane coating (STEP 12) 5 times, resulting in glossy and nicely coated finish. ※During coating, be careful of liquid pooling. 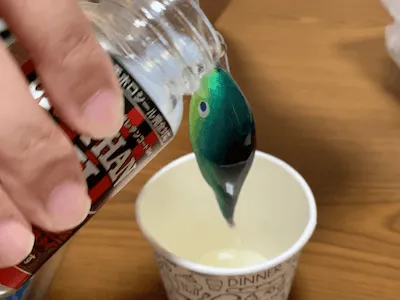
STEP 16: Attach Hooks
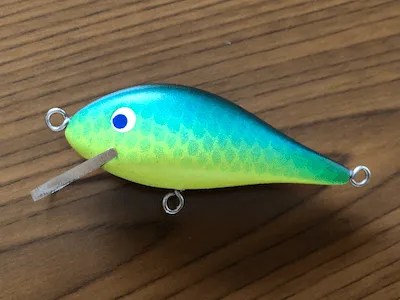
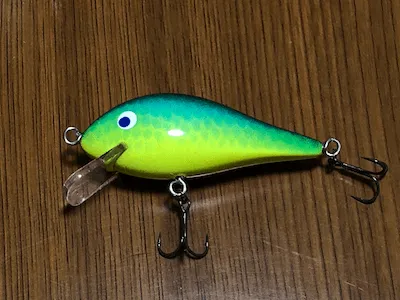
Attach Rings and Hooks, Lure Complete!
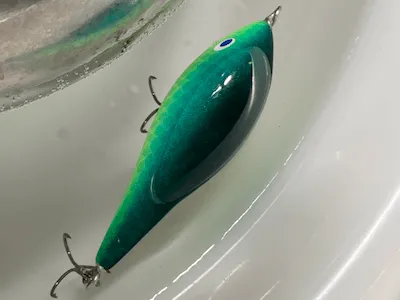
STEP 17: Final Check
Check Floating in Water
Learning Form Modeling Basics
In my case, although I had studied Fusion360 for about half a year, I was unfamiliar and weak at form creation operations, so first I re-studied “Form Modeling Basics” from a book. That book was very easy to understand, so I’ll introduce it as a reference. Since you probably agonize greatly when buying books, I hope this can be one piece of information to help you choose a book suitable for yourself.
Book I Studied
The book I studied this time “Autodesk Fusion Masters Guide Basic Edition Revised 3rd Edition” has form modeling operation procedures, command usage, block movement methods, tips, etc. written in detail and carefully without skipping procedures, so even I who am weak at form modeling could understand easily. Previously, another book I used had skipped operation procedures (partial lack of operation explanation), and I had the trouble of searching the web etc. to supplement learning of operation procedures for those deficiencies, but this book had no such issues and I thought it was a really easy-to-understand good book.
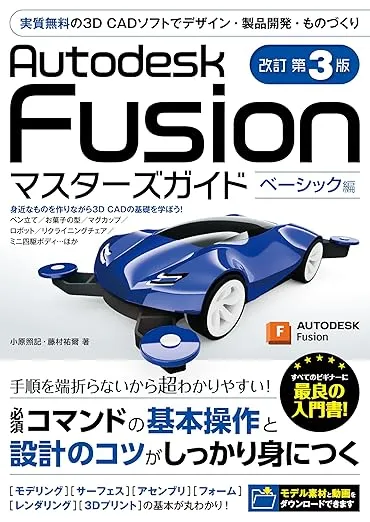
【Title】Autodesk Fusion Masters Guide Basic Edition Revised 3rd Edition
【Chapter 7】: Form Modeling Basics
【Impressions】In Chapter 7 of this book, to learn “Form Modeling Basics” which is one of Fusion360’s features, you make a simple airplane. Even I who am weak at form modeling was able to successfully make the airplane shape task. (Photo below)
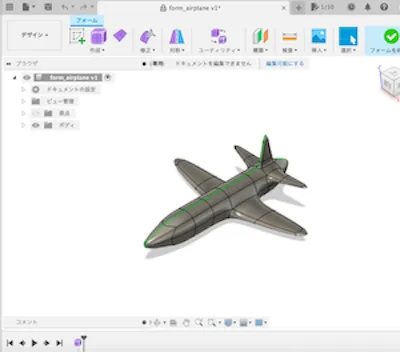
Airplane I form modeled
Type of Lure I Made
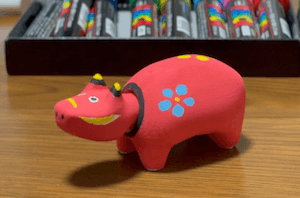
As my first work, I made a crankbait, a lure mainly used when targeting black bass. It’s a lure that receives water resistance with the lip, swaying the body and appealing to fish.
Impressions
The more I struggled with the process, the greater the sense of accomplishment when completed. During the process, I couldn’t quite get the hang of airbrush painting and made the scale range too wide, which is a big regret, so I want to take revenge someday. On the other hand, each process is so difficult that somewhere in my heart I also think “I don’t want to make lures anymore.” Probably, the next revenge might be after I have time to spare…
![[2025] 3D Printer Beginner Guide | From Getting Started to Success Tips](/_astro/3d_printer_eyecatch.ge1TSwpE.png)