· FabLab Westharima Team · Laser Cutter · 3 min read
Laser Cutting: Making Original Boxes with MakerCase (Beginner)
Design your custom box easily with the free tool MakerCase. Just laser cut and assemble! Engrave illustrations or text to make it uniquely yours.
With the free tool MakerCase, anyone can easily create custom boxes!
Just enter your desired dimensions and the software automatically generates assembly-ready box data. Engrave illustrations or names to create your own special box.
Materials
- MDF Board 4mm (for box body)
- Wood glue (for reinforcement, optional)
Equipment & Software
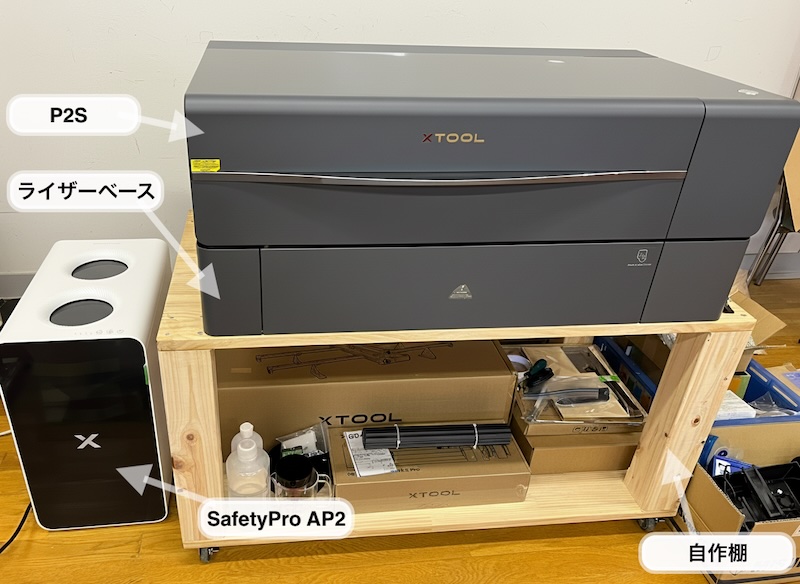
- Equipment: xTool P2S 55W (CO2 Laser Cutter)
- Software: MakerCase (free web tool), xTool Studio
- Data: Created with MakerCase
Please check the Equipment List for currently available machines.
How to Make (Total Time: About 1 hour)
STEP 1: Create Data with MakerCase
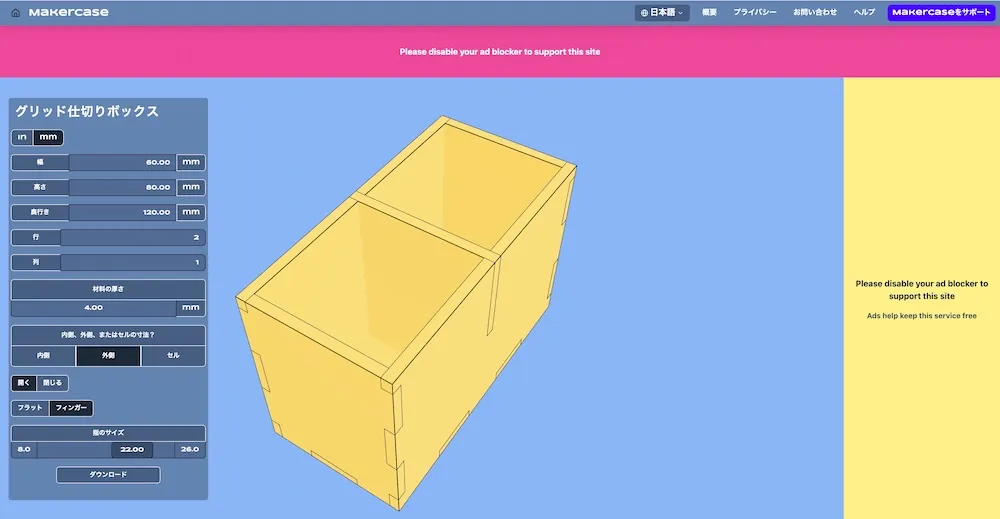
Select box size and options in MakerCase
- Access MakerCase
- Select “Box”
- Enter dimensions
- Enter material thickness
- Select other desired options
- Download SVG file
💡 What is MakerCase?
“MakerCase” is a free online box creation tool. Simply select a box shape and options to download a development diagram of your desired shape and dimensions. You can choose from several data formats when downloading.
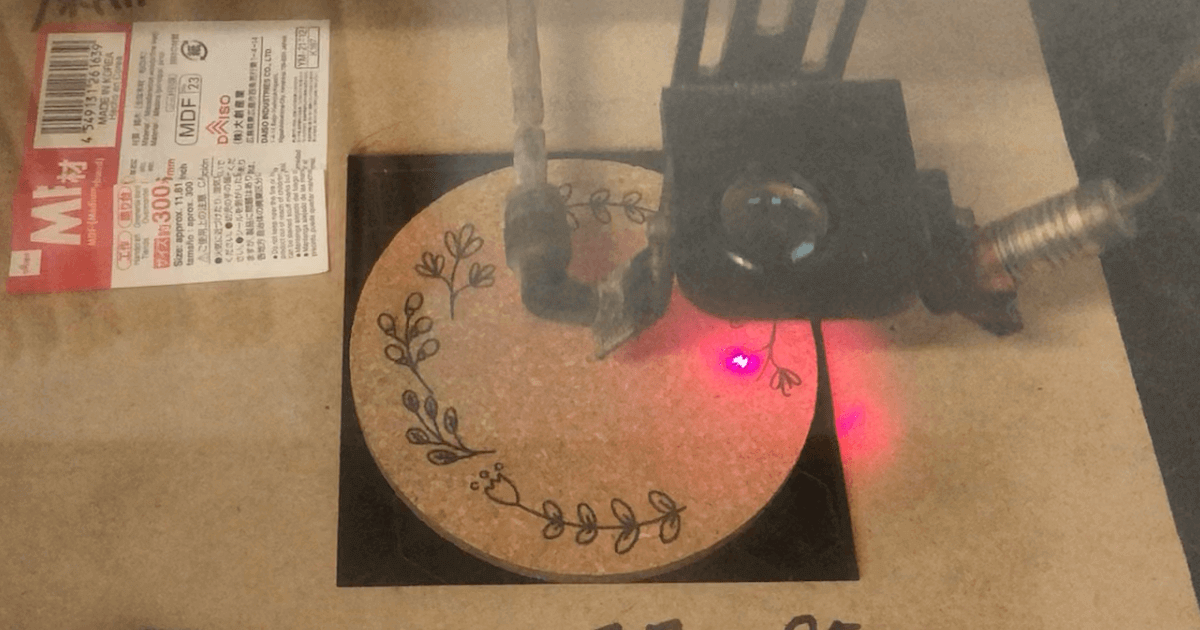
STEP 2: Laser Cutting
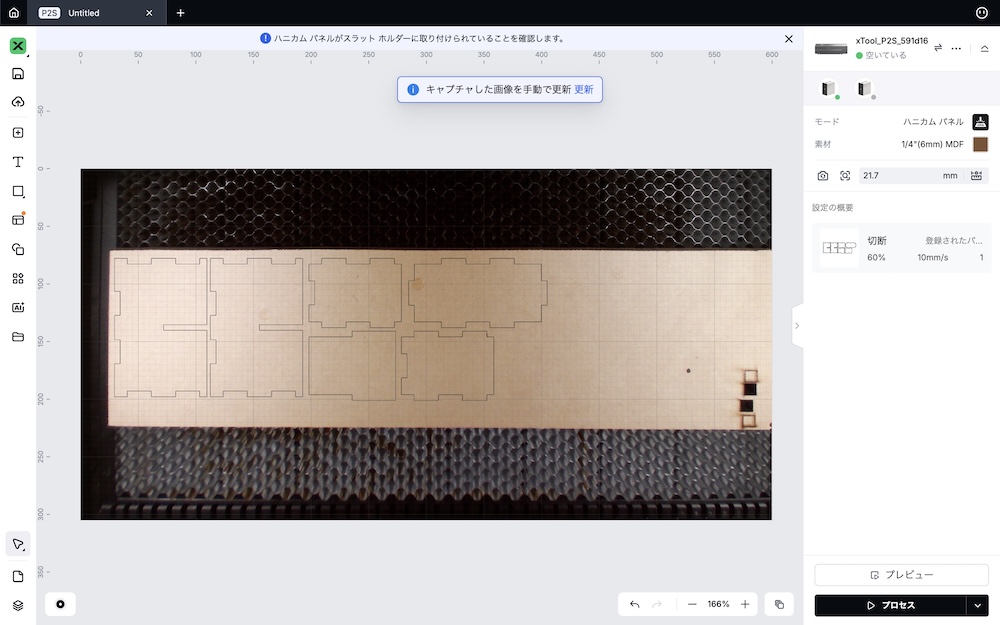
Import the data and execute the laser cut.
For detailed operating instructions, please refer to:
Simple Process:
- Import SVG file in xTool Studio
- Material settings
- Set the material in the laser cutter
- Verify parameters and start
⚠️ Never leave the machine while cutting!
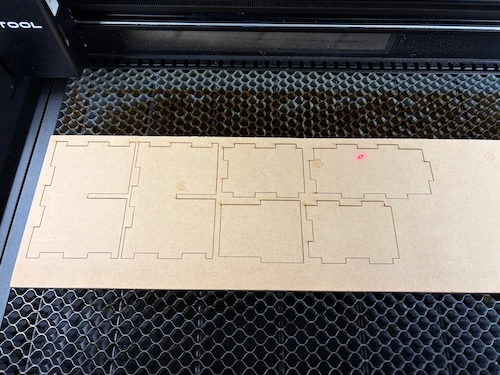
STEP 3: Assembly
Assemble parts after cutting is complete
- Remove parts
- Light sanding (remove burrs)
- Assemble while checking finger joints
- Reinforce with wood glue if needed
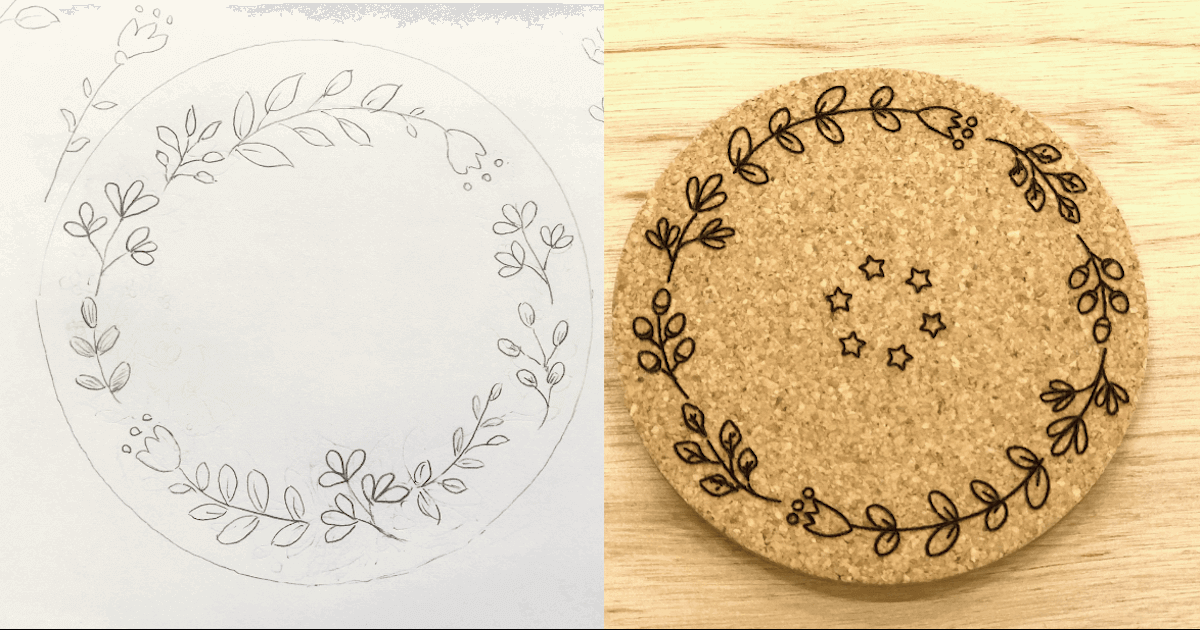
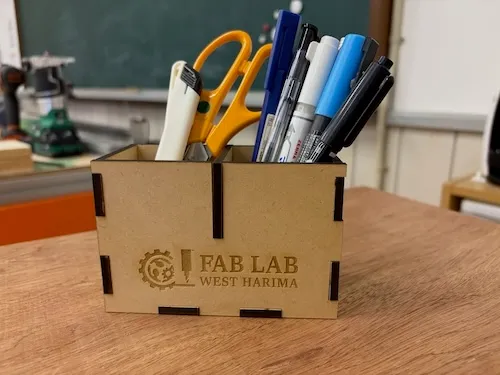
STEP 4: Add Illustrations/Text (Optional)
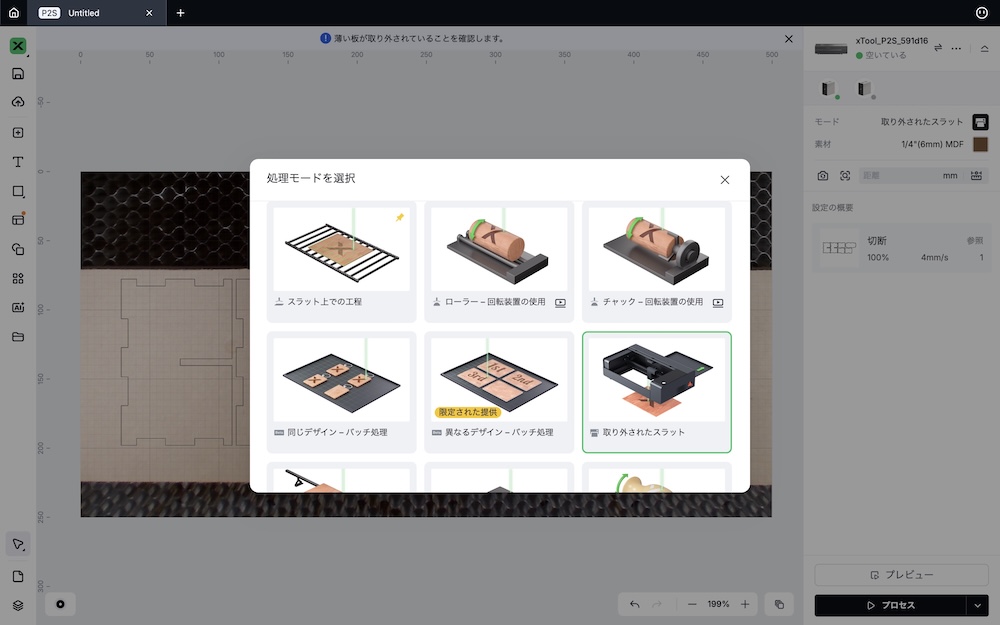
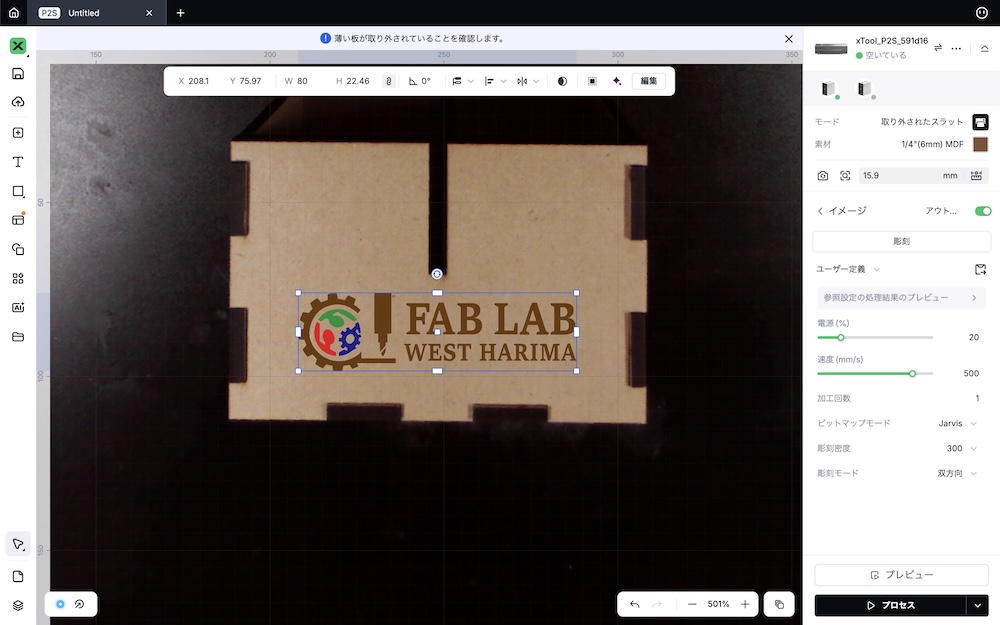
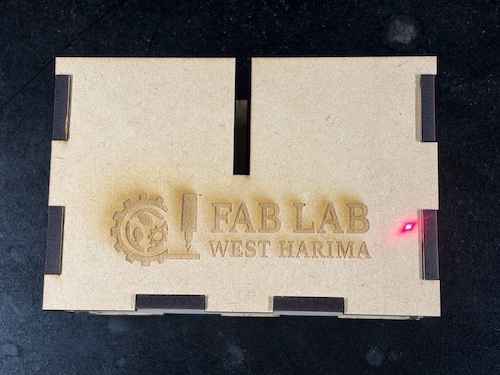
After assembly, I wanted to add illustrations, so I switched the xTool P2S to slat-removed mode and added laser engraving.
- Launch xTool Studio
- Switch xTool P2S to slat mode
- Add illustrations or text
- Set engraving area
- Set the assembled box and engrave
*This step can be skipped to create a simple box only.
Where to Get Illustration Materials
| Site | Features | License |
|---|---|---|
| ICOOON MONO | Free icons, commercial use OK | Check requirements |
| Irasutoya | Cute illustrations | Commercial use OK (with limits) |
| Etsy | Paid, high-quality designs | Available by purchase |
⚠️ License Notice: Always check each site’s terms of use and comply with their licenses.
Congratulations! Your original box is complete!
Parameters Used
These parameters are for the xTool P2S 55W. Parameters vary by machine and material, so always do a test cut to find the appropriate values.
| Material | Process | Speed | Power | Passes | Density | Time | Notes |
|---|---|---|---|---|---|---|---|
| MDF Board 4mm | Cut | 10mm/s | 60% | 1 | - | ~15-20 min | Varies by design complexity |
| MDF Board 4mm | Engrave | 500mm/s | 20% | 1 | 300 | ~5-10 min | For illustrations/text |
Variations
Try Different Sizes
- Pencil case (elongated shape)
- Small storage (square)
- Tool box (larger size)
Add Personality with Decoration
- Engrave names or dates
- Engrave illustrations or logos
- Paint with colors
- Apply varnish for finishing (multiple coats recommended)
Try Different Materials
- Plywood: Beautiful wood grain
- Acrylic: Clear and modern finish
Summary & Impressions
- With MakerCase, even beginners can easily create box data
- Just enter dimensions, so few mistakes
- Finger joint structure makes assembly easy, fixed with wood glue or glue gun
- Engrave illustrations or text for perfect gifts