xTool P2S 55W Basic Operation Manual
Safety Measures (Required Reading)
Laser cutters can lead to fire and health hazards if used incorrectly.
Essential requirements:
- ⚠️ Safety glasses required - To prevent blindness from laser light
- ⚠️ Ensure proper ventilation - To protect from toxic gases and fumes
- ⚠️ Never leave machine during processing - For early fire detection and response
- ⚠️ Do not use prohibited materials - PVC causes toxic gases and machine damage
- ⚠️ Keep fire extinguisher within reach - For emergency response
📖 Please read the complete safety guide: → Laser Cutter Safety Guide
Installing xTool Studio
Use xTool Studio (formerly: xTool Creative Space) to operate P2S.
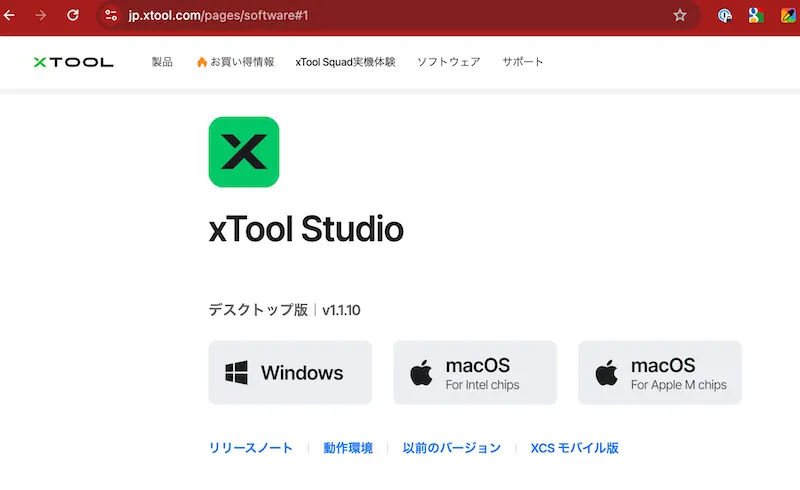
Windows
- Access xTool official site
- Download Windows version from Software download page
- Run downloaded file and follow installation wizard
- After installation completes, launch xTool Studio
Mac
- Download Mac version from xTool official site
- Double-click downloaded .dmg file
- Drag & drop xTool Studio app to Applications folder
- Launch xTool Studio from Applications folder
⚠️ On Mac, “unidentified developer” security warning may appear on first launch. → Go to System Preferences > Security & Privacy > Select “Open Anyway”
Device Connection
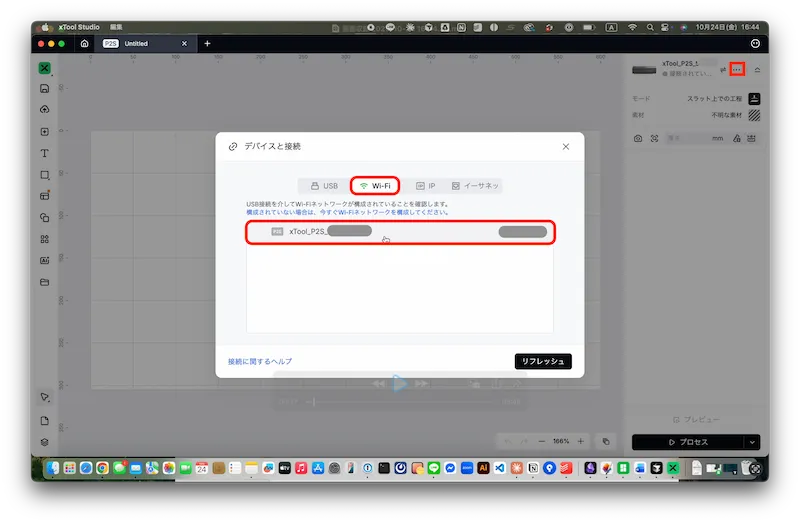
Wi-Fi Connection
- Turn on P2S main unit power
- Launch xTool Studio
- Add P2S from device list
- Configure Wi-Fi connection (connect within same network)
If Wi-Fi connection is unstable:
- Keep P2S / PC / Wi-Fi router as close as possible
- Restart P2S and PC (turn off, wait 30 seconds, turn on again)
- If not resolved, USB connection is recommended
USB Connection
- Turn on P2S main unit power
- Connect P2S and PC with USB cable
- Launch xTool Studio and select device
Basic Operation Flow
Interface Overview
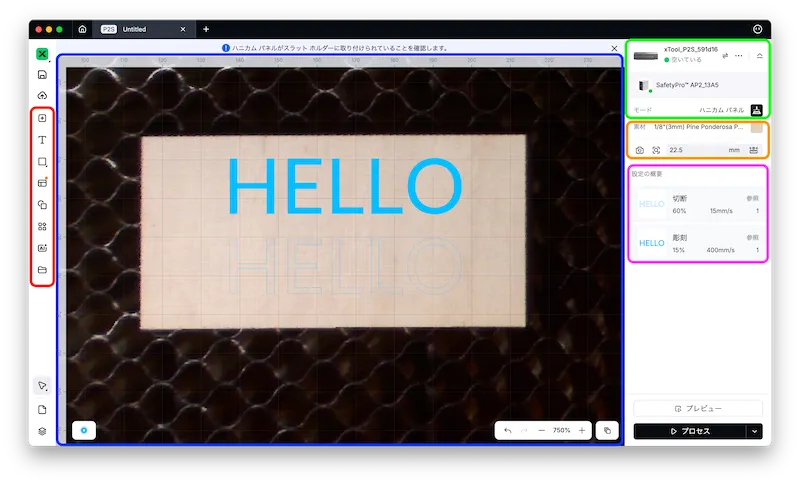
- Red box: Design toolbar - Image import, shape drawing, text input, etc.
- Blue box: Canvas - Where you create and edit designs
- Green box: Device settings - Device selection, processing mode change
- Orange box: Material settings - Material selection, camera position check
- Pink box: Processing settings - Configure processing parameters
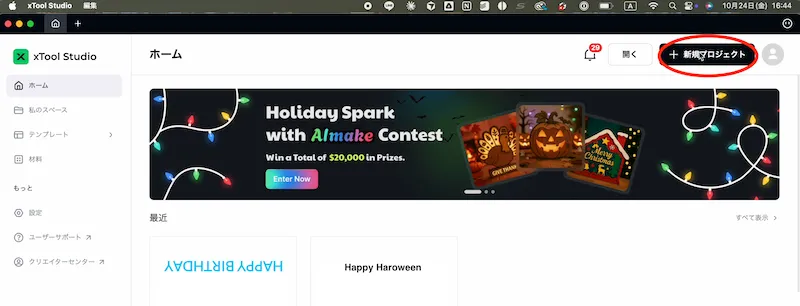
1. Create New Project
- Launch xTool Studio
- Click “New Project”
- Select device (P2S)
2. Select Processing Mode
Select mode according to equipment configuration:
- Standard mode (Honeycomb panel)
- Riser base mode
- Rotary mode, etc.
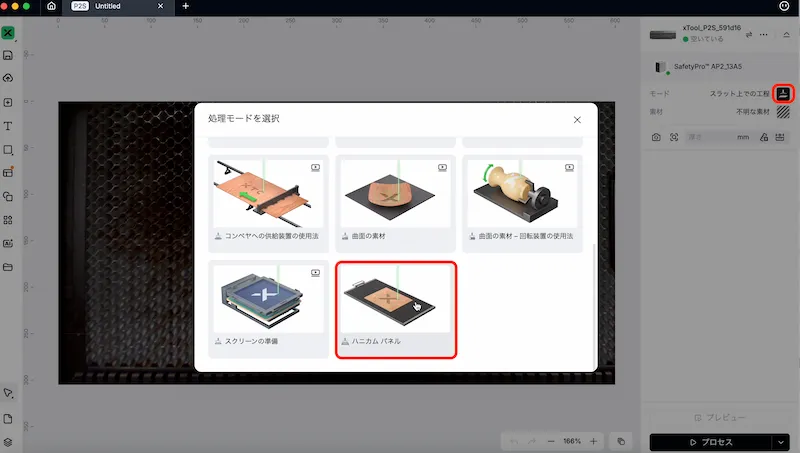
⚠️ Install the same equipment before selecting processing mode
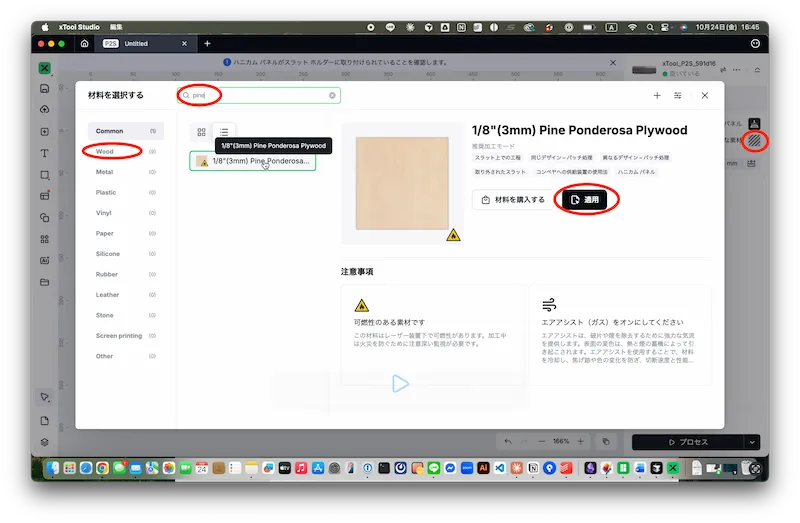
3. Material Settings
- Select material to use from “Material”
- Click “Apply”
4. Fix Material
- Place material on processing bed (honeycomb panel)
- Fix firmly with jig or tape
⚠️ Weak fixing will cause shifting and processing failure
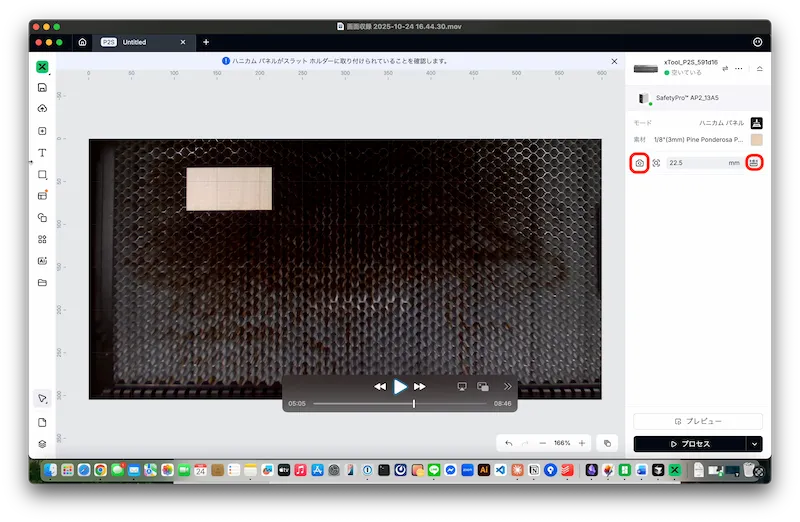
5. Update Background and Measure
- Click “Update Background”
- Click “Aligned Measurement”
- Click on material to measure thickness
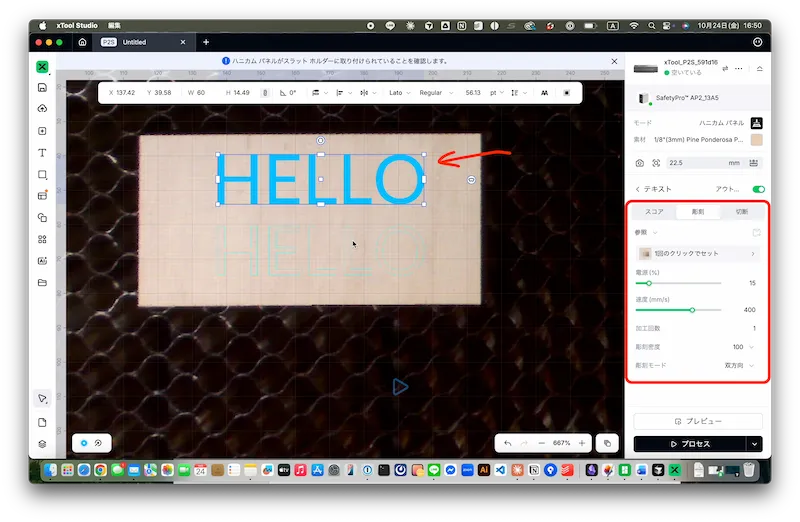
6. Place Design
- Place text, shapes, images, etc.
- Set “Engraving” or “Cutting” for each object
| Mode | Description |
|---|---|
| Engraving | Shallow carving of surface |
| Cutting | Laser penetrates along specified line |
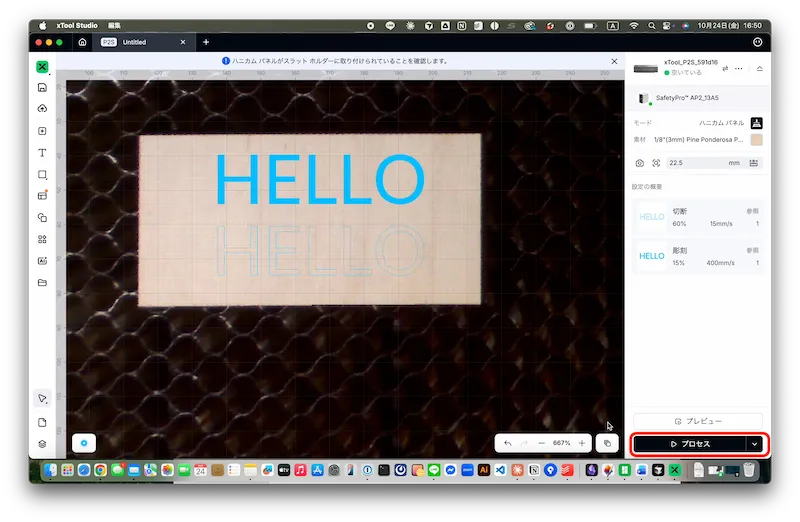
Engraving Settings Example
Cutting Settings Example
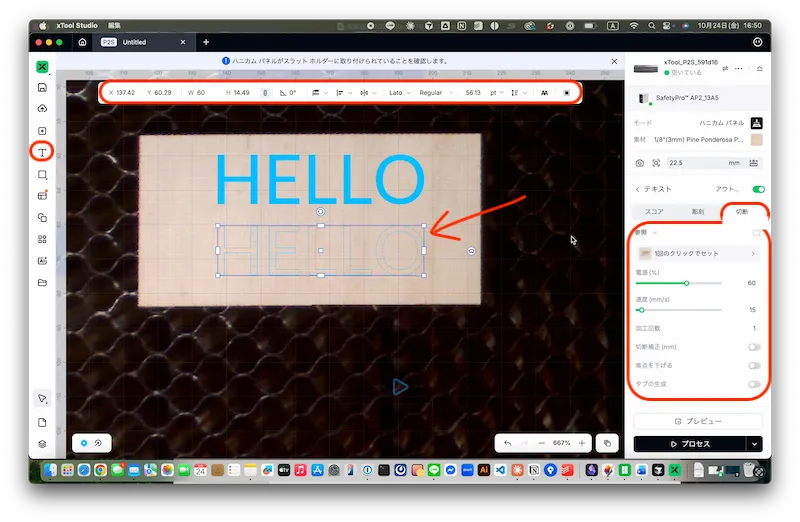
7. Parameter Settings
| Item | Description |
|---|---|
| Power | Laser output intensity. Higher = more powerful |
| Speed | Head movement speed. Slower = deeper |
| Passes | Number of processing passes |
⚠️ Optimal values vary by material. Adjust based on official reference values ⚠️ Power 100% causes significant laser wear, use moderately
8. Start Processing
- Click “Process” button
- Pre-processing check:
- Is material fixed?
- Any obstacles in processing range?
- Click “Start” button
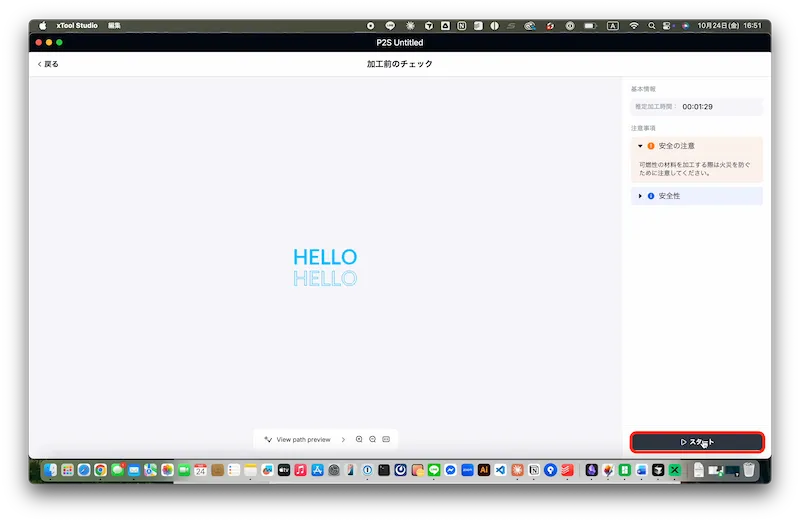
- Press Start button on top of P2S main unit to begin
⚠️ Do not leave machine during processing, always monitor
9. After Processing
- Confirm completion with beep sound
- Do not remove material immediately, wait 1-2 minutes (material is hot)
- Confirm smoke is completely exhausted before removing
Troubleshooting
Device Cannot Connect
USB Connection:
- Check USB cable is firmly connected
- Restart xTool Studio
- Restart PC
Wi-Fi Connection:
- Check P2S and PC are on same network
- Restart P2S and PC
- If not resolved, switch to USB connection
”Confirm Honeycomb Panel is Installed Correctly” Error
- Cause: Bottom support may be installed in wrong location
- Solution: Reinstall bottom support correctly to bottom tier of P2S main unit
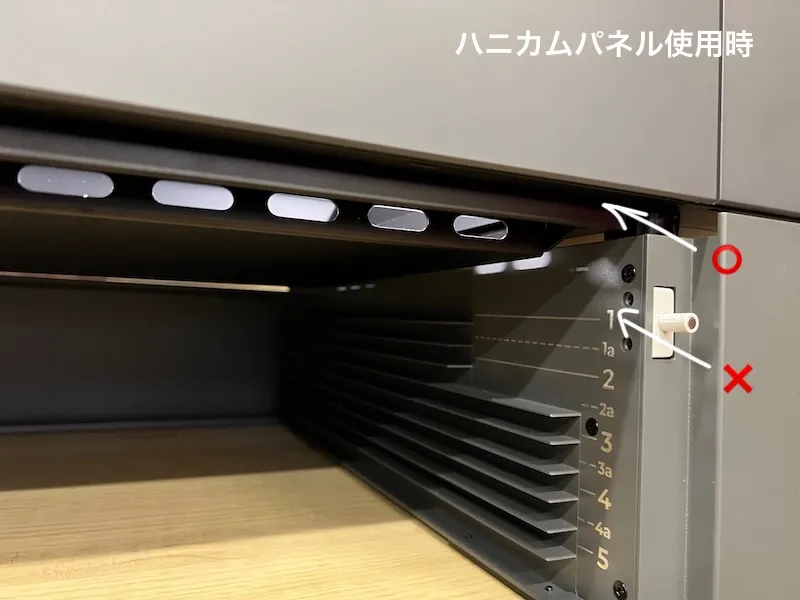
⚠️ Be especially careful when returning to honeycomb panel after using riser base
Uneven Processing
- Check processing bed is not tilted
- Check lens or mirror is not dirty (clean if needed)
- Check material is firmly fixed