· FabLab Westharima Team · Laser Cutter · 3 min read
Laser Processing: How to Efficiently Make Multiple Items with the Same Design
How to make a jig for creating multiple items with the same design in laser engraving. A practical guide to improving work efficiency and quality by fixing processing positions.
When making multiple items with the same design in laser engraving, placing them in the same processing position takes time and effort. That’s when a “jig that can fix workpieces in a fixed position for processing” comes in handy. This time, I created a simple jig when processing cork coasters, so I’ve compiled the making process, points I noticed, and impressions as a personal reference.
What is a Jig?
- Something to fix workpieces in a fixed position for processing
- Not only shortens work time but also stabilizes quality
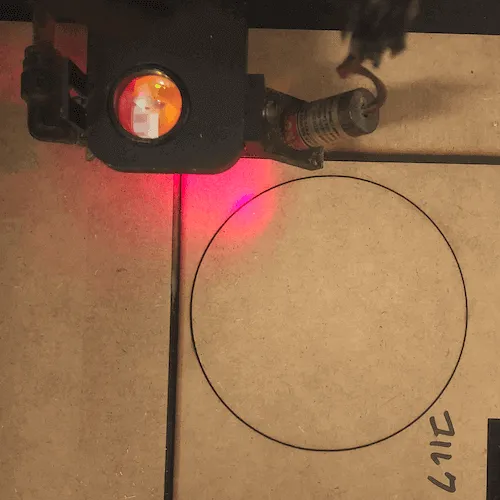
Cut slightly larger than the cork’s outer diameter (outer diameter + about 0.5 mm)
Fit cork into the cut hole for processing
After processing the cork, remove it and fit in a new cork, and you can place the cork in the same position.
How to Make a Jig
STEP 1: Measure Size
Measure the outline (contour) size of the workpiece
- Workpieces may have slightly different sizes, so I recommend measuring multiple sizes.
STEP 2: Select Material
Select jig material
- MDF, acrylic, board materials, etc. are often used as jig materials.
- Ideal material has no warping, a 90-degree angle in the upper left corner, and straight top and left edges.
STEP 3: Create Data
Create outline data
- Use Illustrator or similar to create outline data of the workpiece.
- Layout the required number at the required size.
STEP 4: Laser Cut
Cut outline with laser
- Cut with optimal parameters for each laser equipment and each material.
STEP 5: Attach Base Plate
Attach base plate (base) if necessary
- For engraving work, a jig with a base plate (base) is useful.
- With a base plate, you can easily move the jig with the workpiece set from the work table to the laser processing machine.
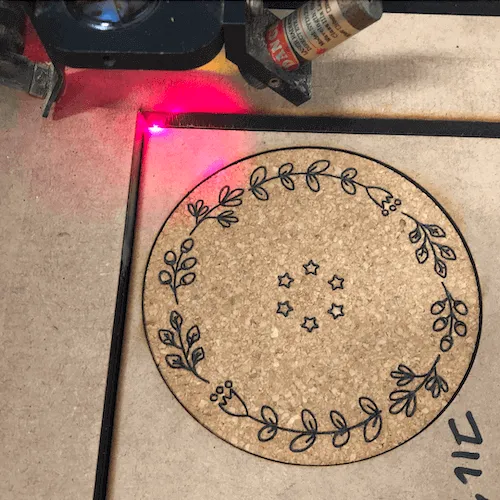
STEP 6: Process Workpiece
Use the completed jig to actually process the workpiece
*If the processing position is off, make minor corrections to the position and reprocess.
Points I Noticed While Making
- Outline size: Workpieces may have slightly different sizes, so it’s more reliable to measure multiple items to confirm the size.
- Outline shape: Think about an outline shape that makes it easy to remove the workpiece from the jig after processing. As shown in the photo below, improving the outline shape made it possible to position in a fixed place and also made it easier to remove.
Before improvement: Difficult to remove from jig
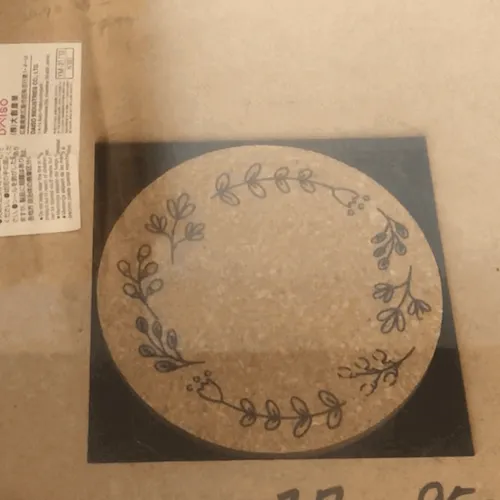
After improvement: Easy to remove from jig
Impressions
- Since most jigs are created by laser processors for themselves, it’s difficult to find the manual you want.
- The shape of the workpiece and outline don’t necessarily match. Since workpieces vary, creating your ideal jig is likely to be a repetition of trial and error.