Laser Cutting: How to Make Halloween Decorations (Intermediate)
Create and edit your own design data for laser cutting! Learn the complete process from acquiring/editing data to laser cutting, painting, and decoration.
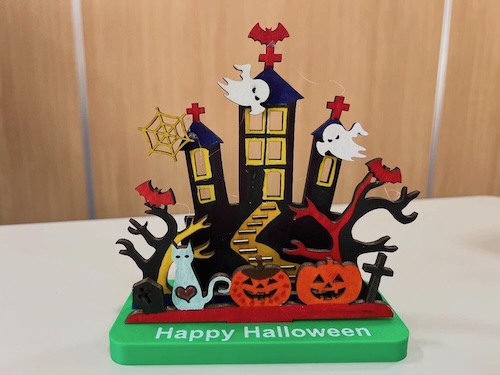
Edit your own design data and create original Halloween decorations!
Download free or paid design data, edit it with Illustrator, and laser cut it. This tutorial carefully explains the entire process from data preparation to cutting, painting, and decoration.
Materials
- Plywood 3mm (for decoration body)
- Acrylic paint (black, orange, purple, white, etc.)
- Decoration materials (glitter, ribbons, beads, etc.)
- Glue gun (for adhering parts)
Equipment & Software
- Equipment: xTool P2S 55W (CO2 Laser Cutter)
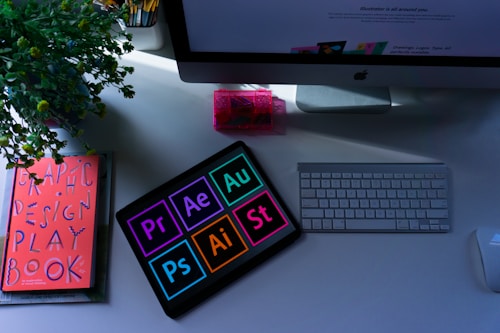
- Software: xTool Studio (for laser cutting), Illustrator or Inkscape (for data editing)
- Data: Download from free/paid sites and edit yourself
Please check the Equipment List for currently available machines.
How to Make (Total Time: About 1.5 - 2.5 hours)
Process Overview
Download SVG data from free/paid sites (5 min)
Adjust size and design in Illustrator (1+ hour, varies by person)
Import data and execute cut (15-20 min)
Gently remove parts after cutting (2 min)
Paint with markers or acrylic paint (15-20 min)
Add glitter and beads for decoration (15-20 min)
Your work is finished (1 min)
STEP 1: Get Design Data
Download Halloween design SVG data
Download SVG files from free or paid design sites.
Recommended Data Sources
| Site | Features | License |
|---|---|---|
| ICOOON MONO | Free, commercial use OK | Check requirements |
| Vecty | Free & paid available | CC BY-NC 4.0, etc. |
| 3axis.co | Free | Check requirements |
| Etsy | Paid, high quality | Available by purchase |
⚠️ License Notice: Always check each site’s terms of use and comply with their licenses.
STEP 2: Edit Data
Edit design with Illustrator or Inkscape
Open the downloaded SVG file and adjust the size and design.
*Since time may be limited at FabLab, we recommend preparing in advance.
Editing Tips
Size Adjustment
- Fit within the laser cutter’s working area
- xTool P2S working area: Maximum 600mm × 305mm
Line Settings
- Cut line width: 0.01mm - 0.1mm (hairline)
- Line colors: Red (for cutting), black (for engraving), etc.
Parts Arrangement
- Arrange efficiently to save material
- Keep at least 5mm spacing between parts
Alternative Tool
- If you can’t use Illustrator, free Inkscape also works
Download Inkscape
STEP 3: Laser Cutting
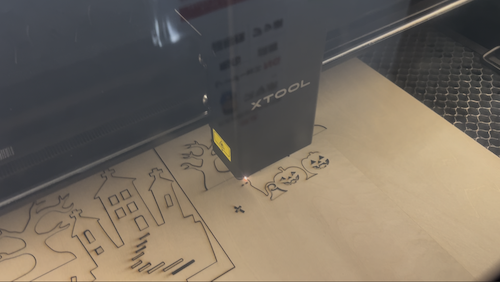
Import the edited data into xTool Studio and execute the laser cut.
For detailed operating instructions, please refer to:
Simple Process:
- Import SVG file in xTool Studio
- Select “Plywood 3mm” in material settings
- Set the material in the laser cutter
- Verify parameters and start
⚠️ Never leave the machine while cutting!
STEP 4: Remove Parts
Remove parts after cutting is complete
- Wait about 30 seconds after cutting (until smoke clears)
- Open the lid
- Gently remove the parts
*Thin parts break easily - handle with care.
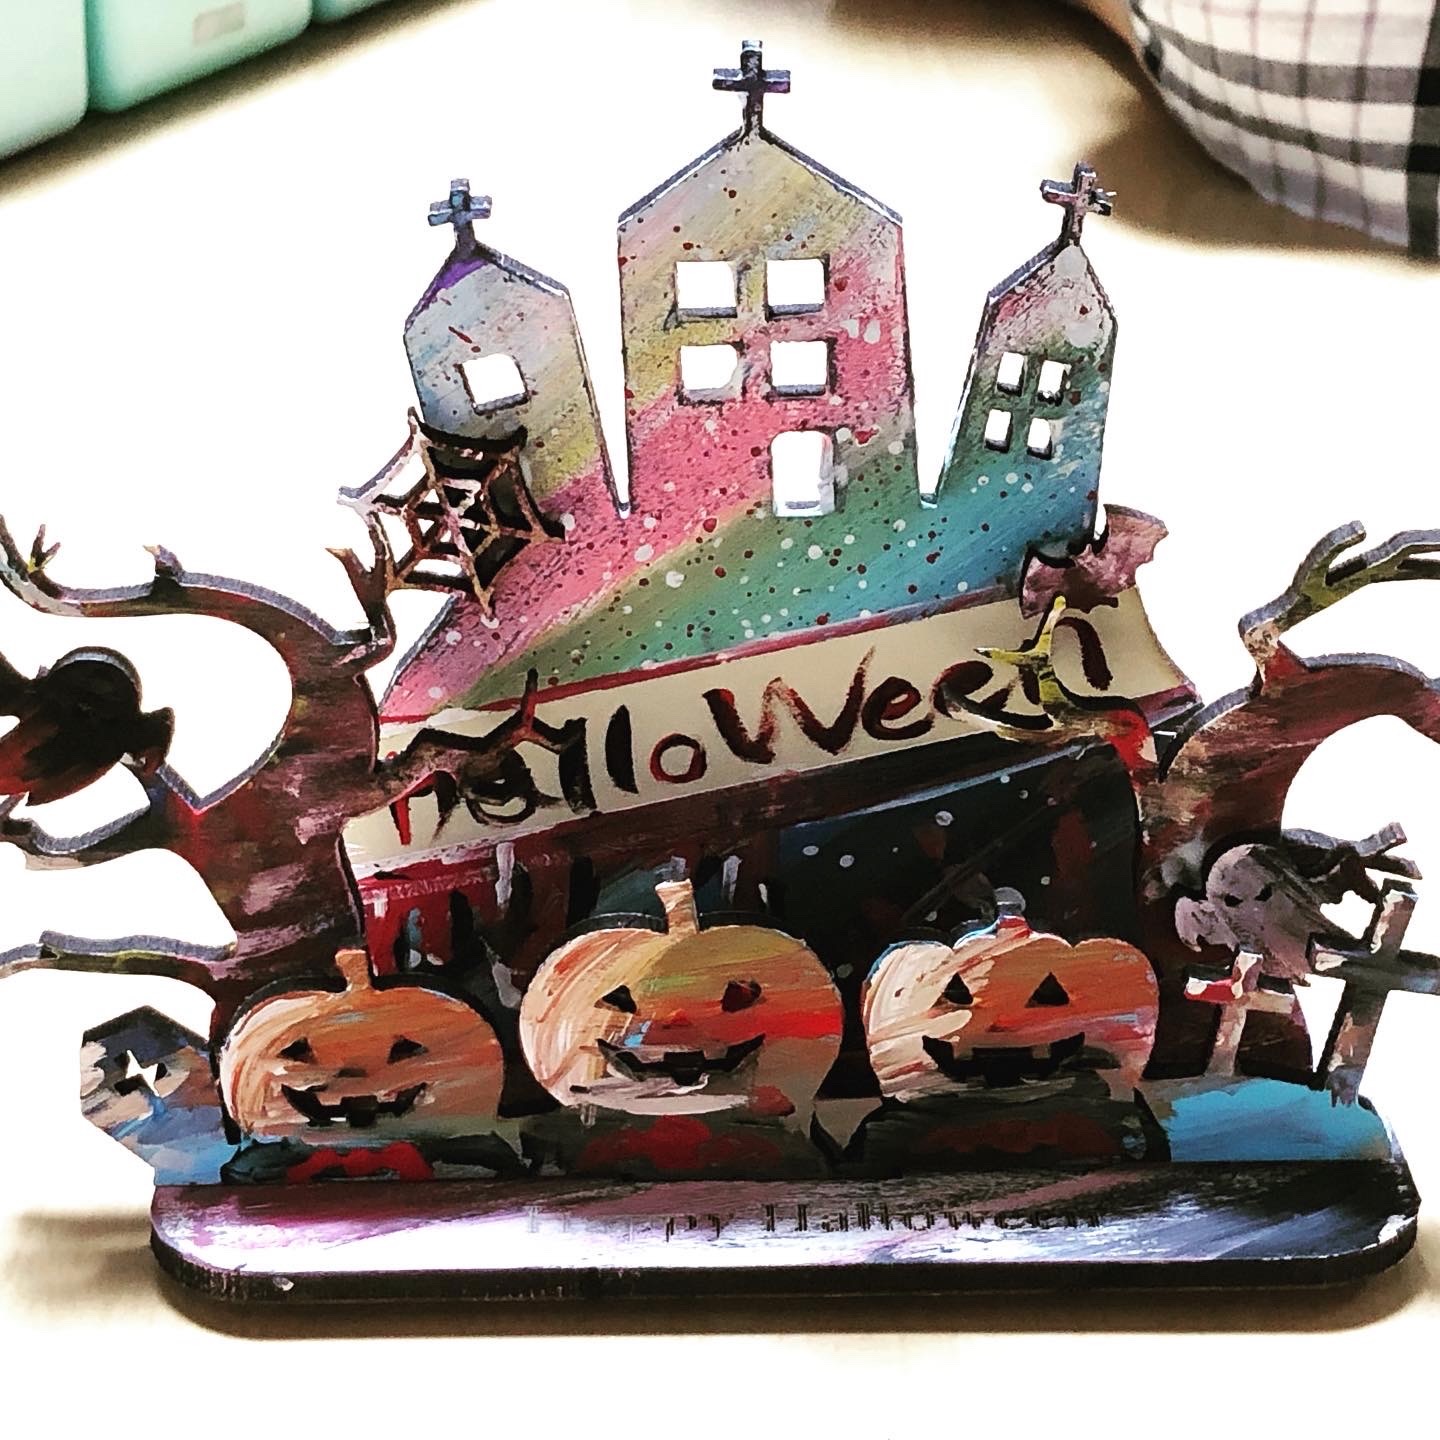
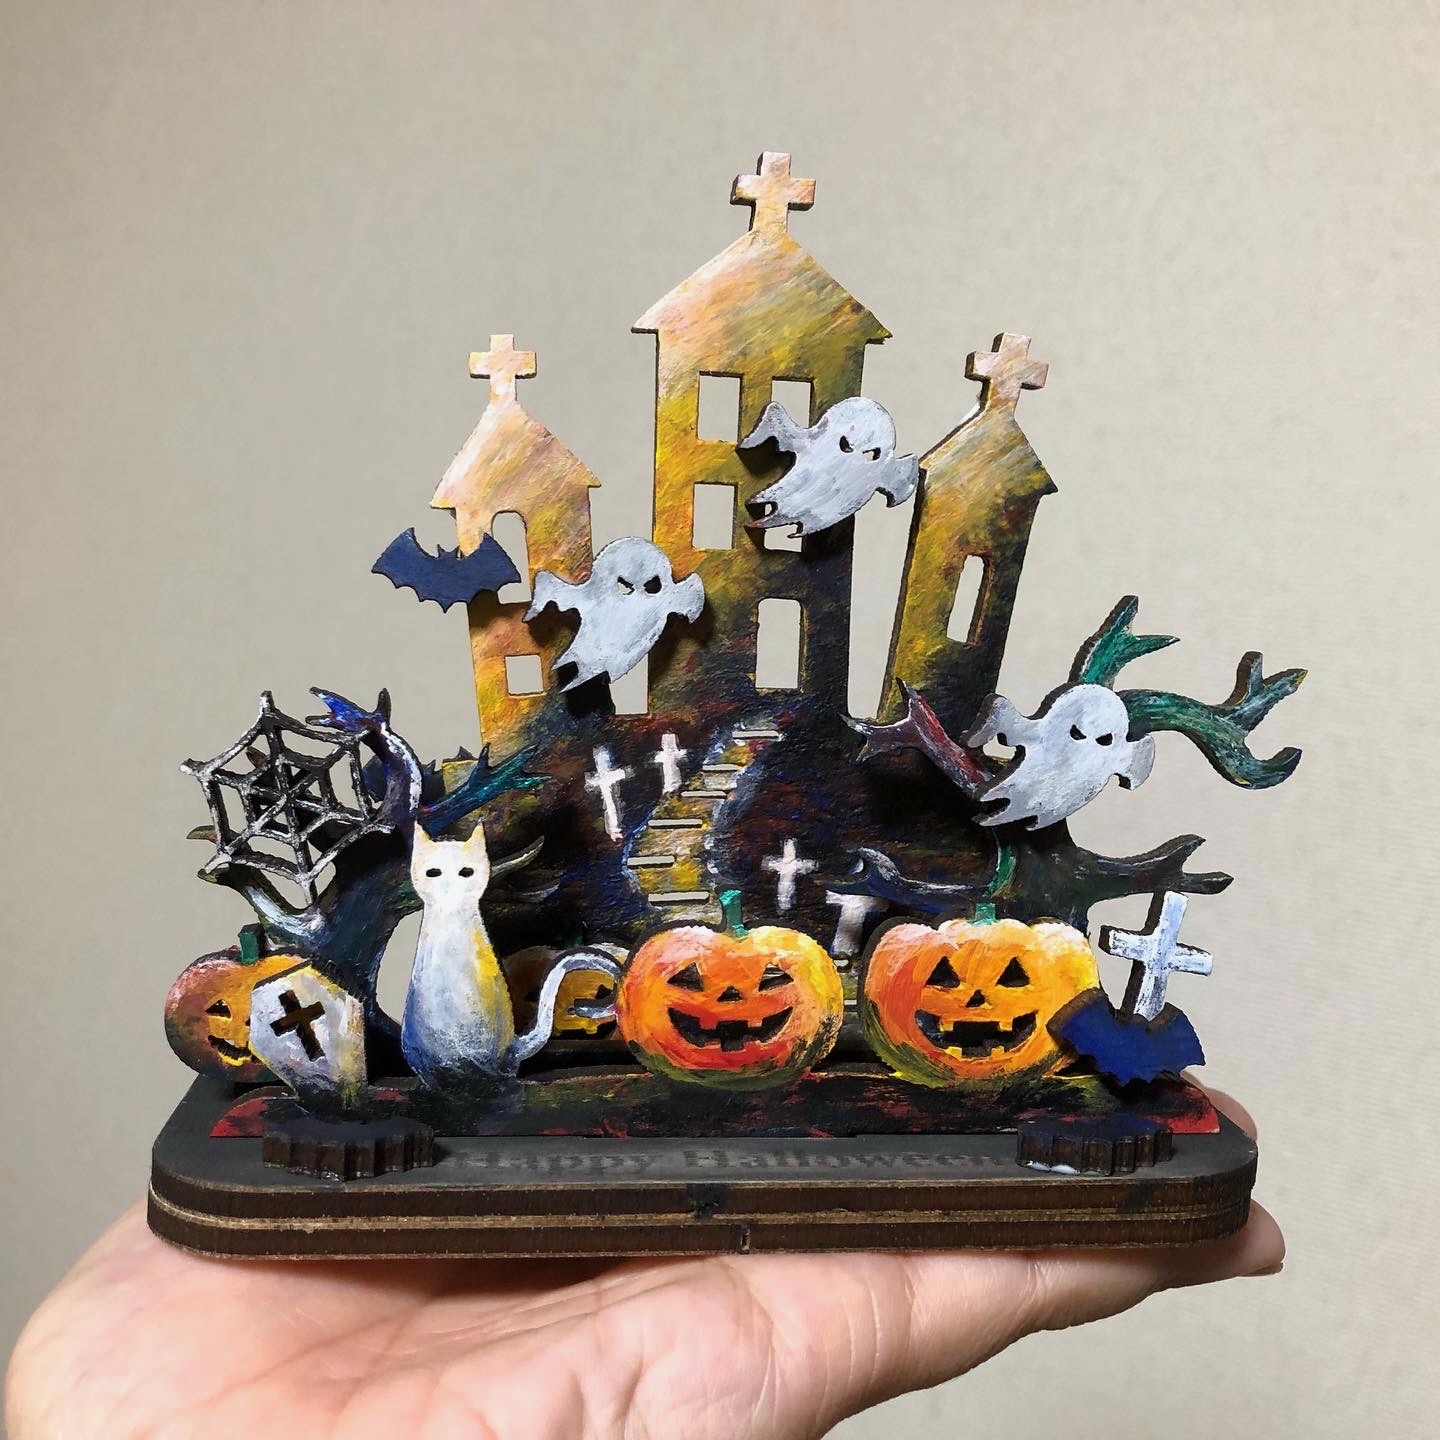
STEP 5: Paint
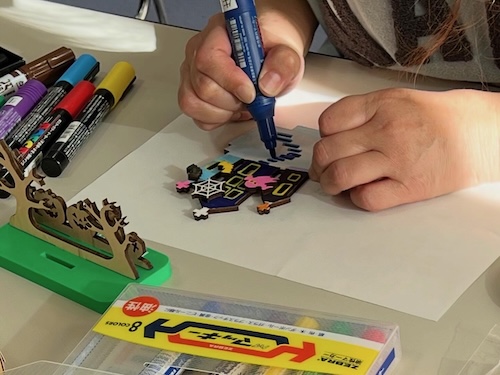
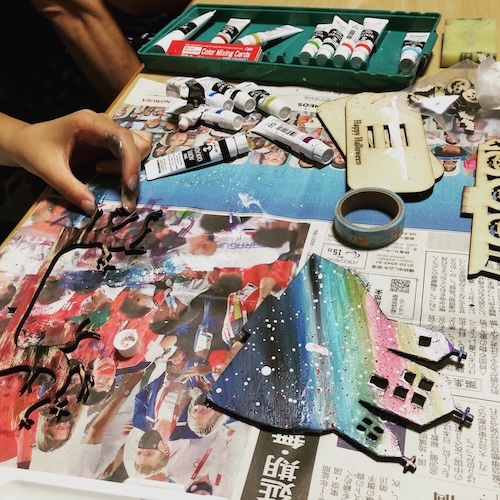
Paint with markers or acrylic paint
Paint in Halloween-themed colors.
- Choose your colors
- Paint gently with a brush
- Let dry for 10-15 minutes
STEP 6: Decorate
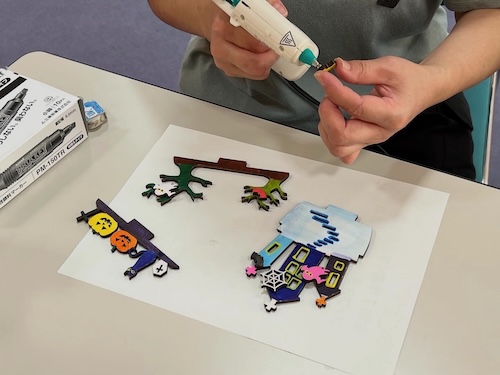
Add finishing touches with decoration
Add glamour with glitter and beads.
- Sprinkle glitter
- Attach beads
- Tie ribbons
- Glue parts with glue gun
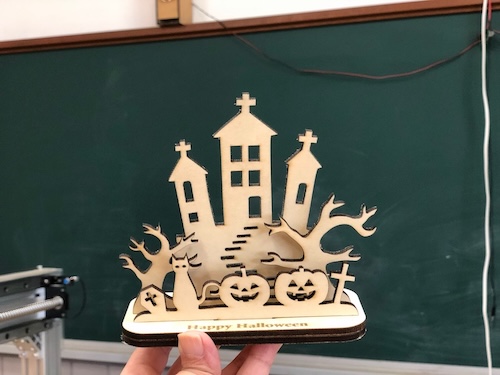
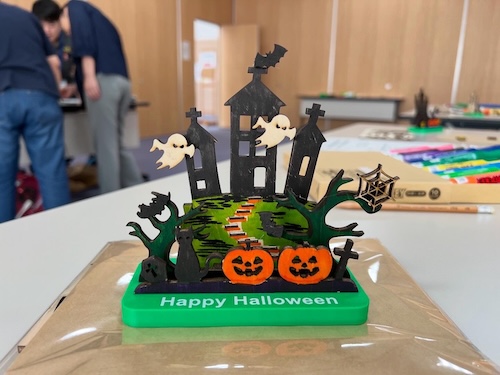
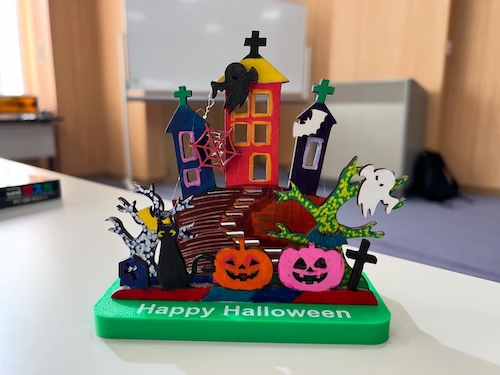
STEP 7: Complete!
Congratulations! Your unique Halloween decoration is complete!
Parameters Used
These parameters are for the xTool P2S 55W. Parameters vary by machine and material, so always do a test cut to find the appropriate values.
| Material | Process | Speed | Power | Passes | Time | Notes |
|---|---|---|---|---|---|---|
| Plywood 3mm | Cut | 15mm/s | 60% | 1 | ~10-15 min | Varies by design complexity |
Variations
Try Different Designs
- Jack-o’-lantern
- Bats
- Spiders and webs
- Witch hats
- Ghosts
Try Different Materials
- Acrylic: Clear and sparkly finish
- MDF: Uniform and smooth surface
Use 3D Printed Base
Combine laser-cut decorations with a 3D printed base for a more three-dimensional and luxurious creation.
Make It a Gift
Add names or messages for a special personalized present.
Summary & Impressions
- Editing your own data creates more original works
- Illustrator editing requires practice, but it’s fun once you learn the basics
- Painting and decorating let you express your personality
- Creating cutting data in advance could be useful for workshops