· FabLab Westharima Team · DIY · 3 min read
Laser DIY: How to Make a Wall-Mounted Toilet Plate
Making a wall-mounted toilet plate the size of a large vehicle license plate using laser processing. Complete process from material selection to cutting, painting, and assembly.
At the end of last year, I created a “wall-mounted toilet plate” at the request of my sister-in-law. Her requests were “I want to display directions to the toilet in the warehouse so visitors can find the location” and “I want it to be the size of a large vehicle license plate so it can be seen from a distance.” I’ve compiled materials, equipment, tools, and work processes as a reference.
Large Vehicle License Plate Size
Height 22cm × Width 44cm
Materials
When I went to the home center, I found a color board close to the size. Of the two types in stock, I liked the white vintage-processed color board, so based on that color board, I purchased other materials.
| Material | Quantity | Purpose |
|---|---|---|
| Color Board (Vintage CB thickness 18mm White 450X200) | 1 | Toilet plate base |
| Board material | 1 | For illustrations and letters |
| Oil Stain 300ml Mahogany | 1 | For illustrations and letters |
| Acrylic spray (color: clear, matte finish) | 1 | For illustrations and letters |
| Bond Quick 5 80g | 1 | For attaching illustrations/letters |
| Zinc black place shelf support 60 | 1 | For wall mounting |
| Zinc black place shelf support 120 | 1 | For wall mounting |
| Hex flange tapping 4X25 | 1 | For wall mounting |
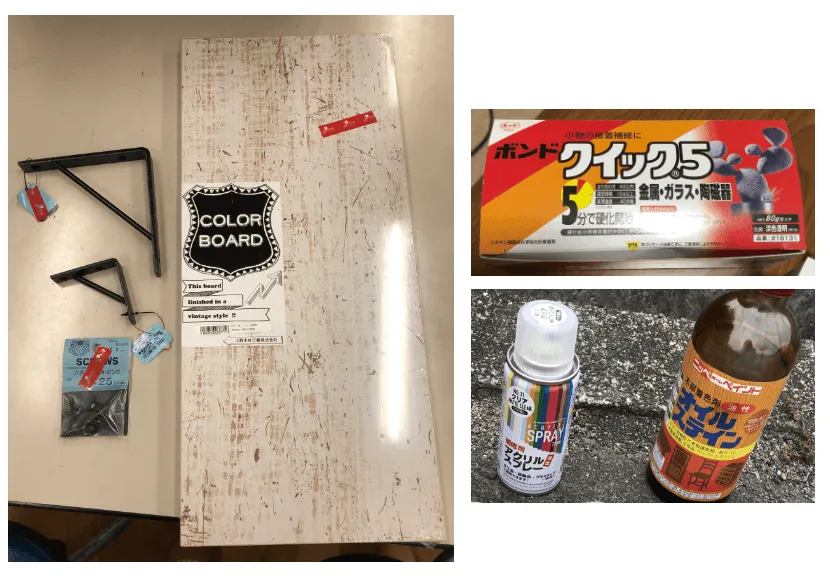
Photo of purchased materials (*Forgot to photograph the board material for illustrations)
Equipment & Tools
※This article was created in 2021. The equipment currently used at FabLab may differ.
- FABOOL Laser CO2 (CO2 laser cutter)
- Rags (old cloth, etc.)
- Gloves
For currently available equipment, please check the Equipment List.
Work Process
STEP 1: Size Confirmation
Confirm desired illustration and letter sizes
STEP 2: Data Creation
Software: Illustrator
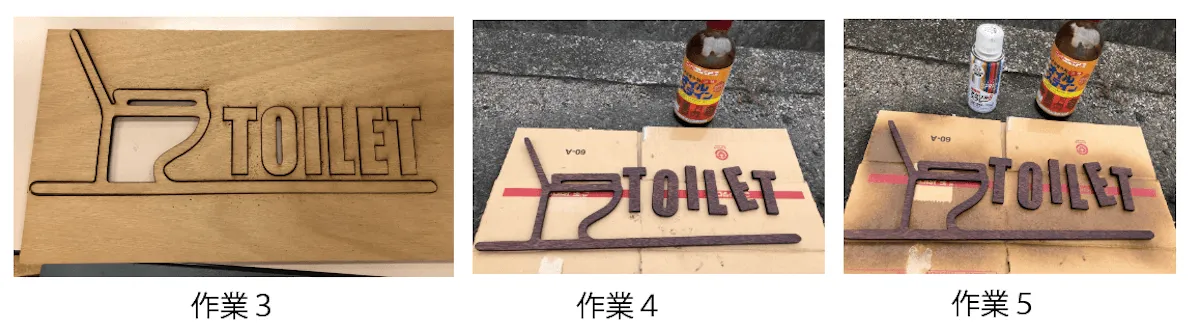
STEP 3: Laser Cut
Cut out with laser cutter
STEP 4: Painting
*Paint color: Mahogany. Applied several coats. *Tools: Rags, gloves
STEP 5: Coating
*For moisture protection / because it’s the same environment as outdoors
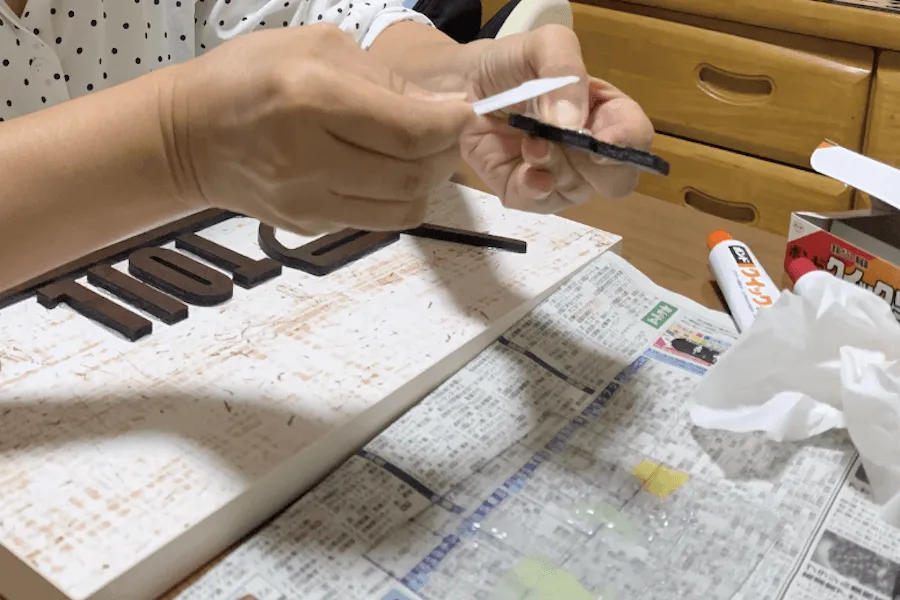
STEP 6: Attach
Bond (Quick 5) to color board
STEP 7: Wall Mounting
Asked contractor renovating toilet
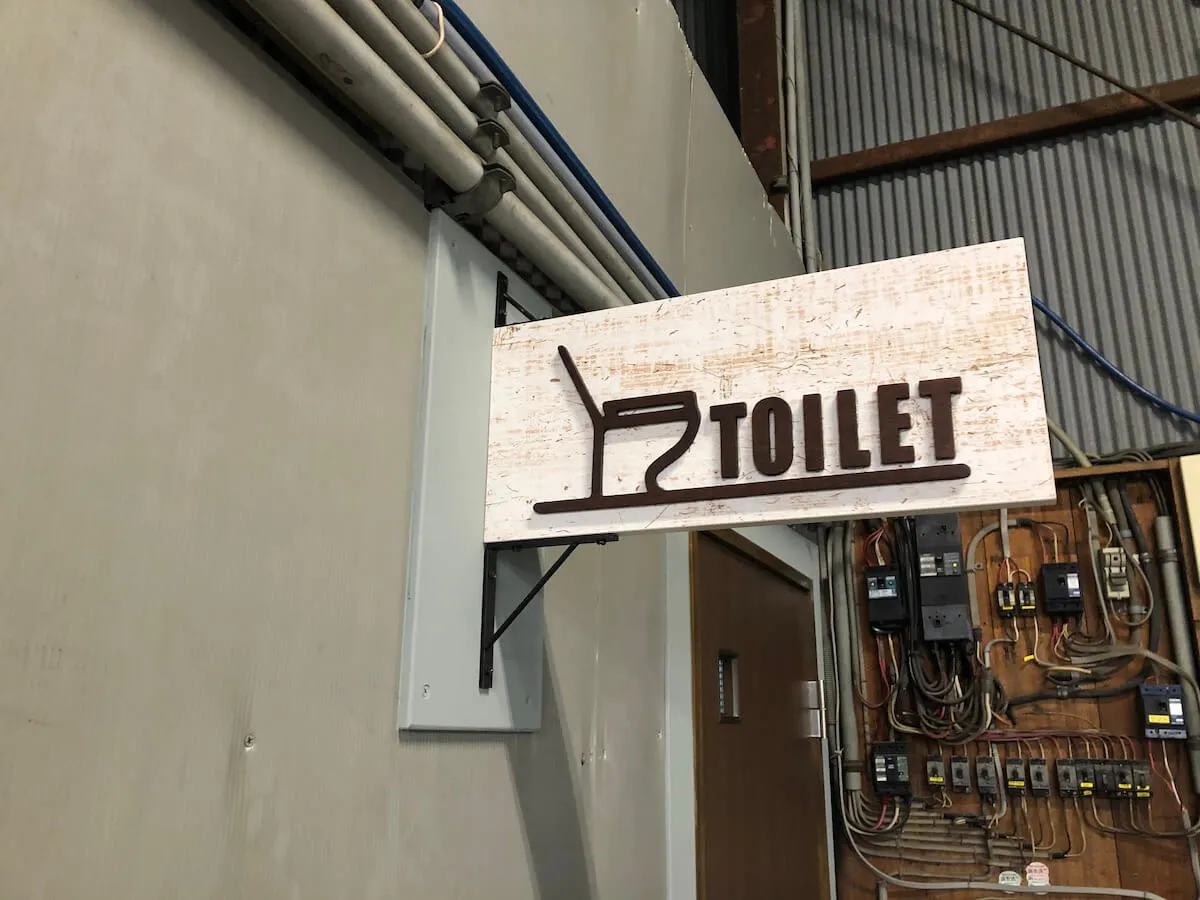
Completed product
That’s it, completed!
Summary & Impressions (Reflections)
- This wall-mounted toilet plate was my first creation.
- I thought it was good to decide from the materials if there’s no completed image.
- Depending on the viewing distance, the appearance differs, so for some items, I thought it would be better to check from both close and far distances.
- I consulted with my sister-in-law and got approval to be allowed to make it while learning laser cutter and Illustrator operations, but I regret not being able to shorten the work period more. I’m sorry it came down to the deadline.
- I was most happy that my sister-in-law was pleased with the finished product.
- I was pleased that the contractor renovating the toilet praised the quality and asked how much it would cost if I were to sell it, as it felt like it was recognized as a product. (By the way, I haven’t received any creation requests yet…)
![[Free & Commercial Use OK] Illustration Material Collection Sites for Business Use](/_astro/656d0ea2b8478d70c95a8f897ecc44e3.Dunk5eRy.png)